Layering
![]()
![]()
![]()
![]()
![]()
![]()
![]()
![]()
![]()
![]()
![]()
![]()
Layering as a technique provides strategies for designs to be developed
by a wide range of freehand machine embroidery techniques.
In one type of layering, two or more fabrics with different characteristics or
qualities are placed over each other, then stitched and cut back to reveal parts
of the contrasting fabrics underneath. Opaque and sheer fabrics are combined.
Some layers may be partial. Some may be made up of thread ends or cut fabric
shapes - or both.
All layers can be stitched together before cutting away areas to reveal
the layers beneath. After stitching, you may also cut right through all layers and
reverse-appliqué further layers behind the opening thus created. Then the design is
developed with freehand machine embroidery.
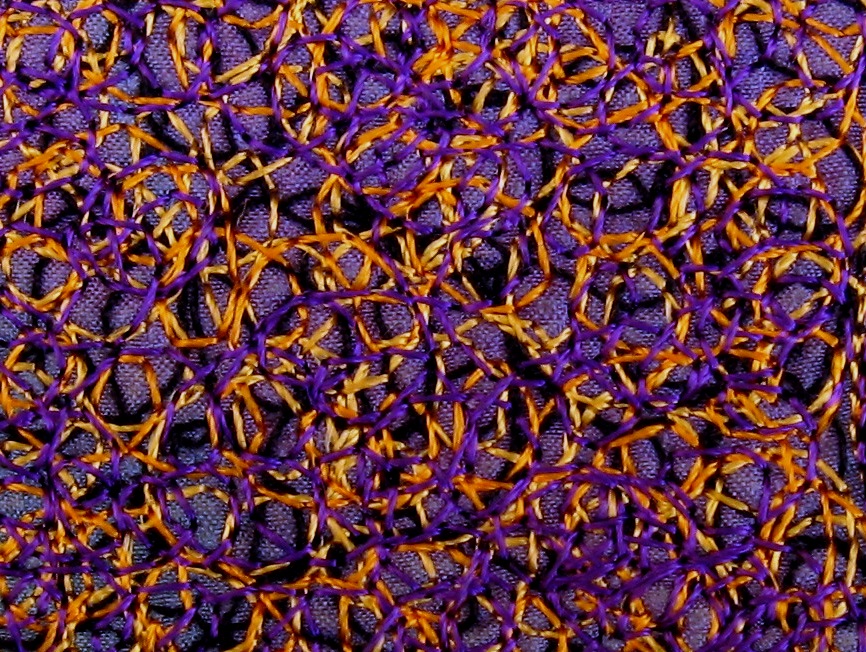
Layering can also mean layering stitches. For example, the same stitch may be
put - in different colours and/or threads - in layers, whole or partial, one over the
other for depth and richness of effect.
![]()
It can also mean layering the same type of stitch two or more times and then, for
the last layer, choosing a thread, colour and type of stitch which will contrast clearly
with what is underneath.

Below are featured some pieces which began life as demonstrations in a
workshop of mine entitled Layering, Optical Colour-mixing and Texture. © I have
taught this across Australia, New Zealand, Canada and the USA, always with very
pleasing - and often exciting - student results.
Really a course on controlled improvisation in design, it focuses on the three
aspects in the title. I eventually finish the demonstration pieces, always naming
them after the city or place in which they began life.
1.  2.
2.  3.
3.
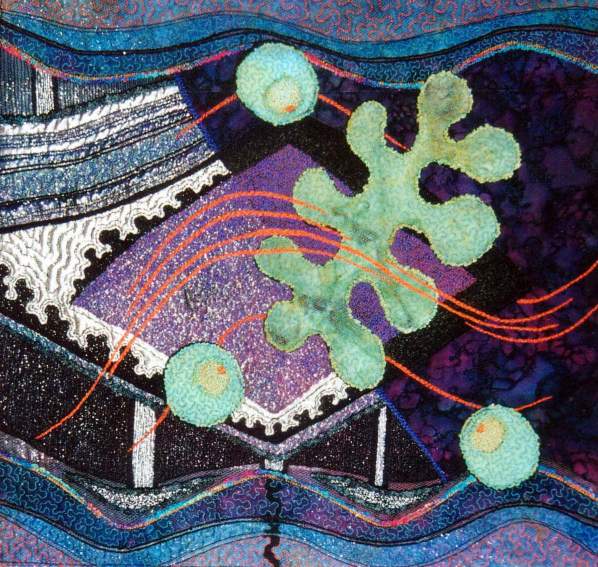
1. Canberra (1999) (Private collection, Winnipeg) - freehand machine embroidery on lamé
and hand-painted silks, including georgette; tulle; hand-painted silk yarn
2. Phillip Island (1999) (Private collection, Toronto) - lamé, hand-painted silks, including
georgette; freehand machine embroidery
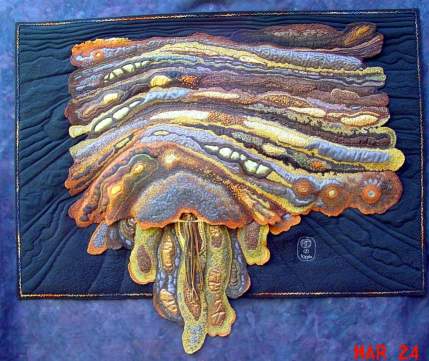
3. Winnipeg (2000/2001) -(Private collection, Winnipeg) - lamé, hand-painted silks, silver
and gold nylon crystal organza; hand-painted silk yarn; freehand machine embroidery,
including off-the edge freehand finish.
4.  5.
5.
 6.
6.
4. Toronto (2000/2001) (Private collection, Seattle, WA) - lamé, hand-painted silks, black
and gold synthetic organza; freehand machine embroidery
5. Hobart (2000) (Private collection, Hobart) - lamé, gold, black and hologram synthetic
organza; thread ends and snippets; hand-painted silk yarn; freehand machine embroidery
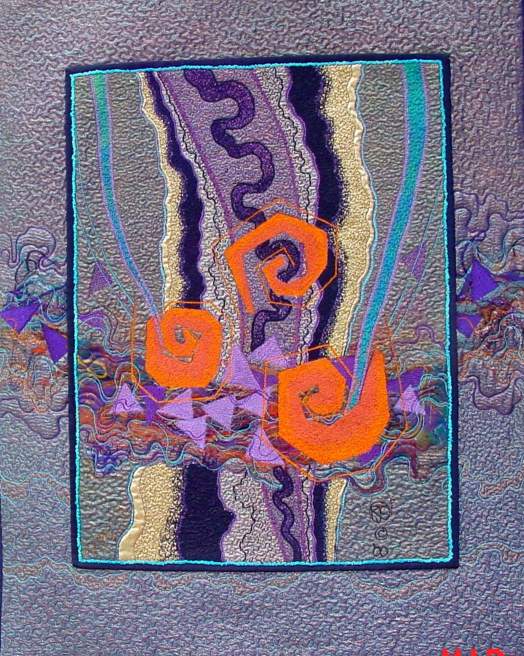
6. Wellington (2001) (Private collection, Boulder, CO) - lamé, hand-painted silks, black and gold
synthetic organza; thread ends and snippets; hand-painted silk yarn; freehand machine embroidery
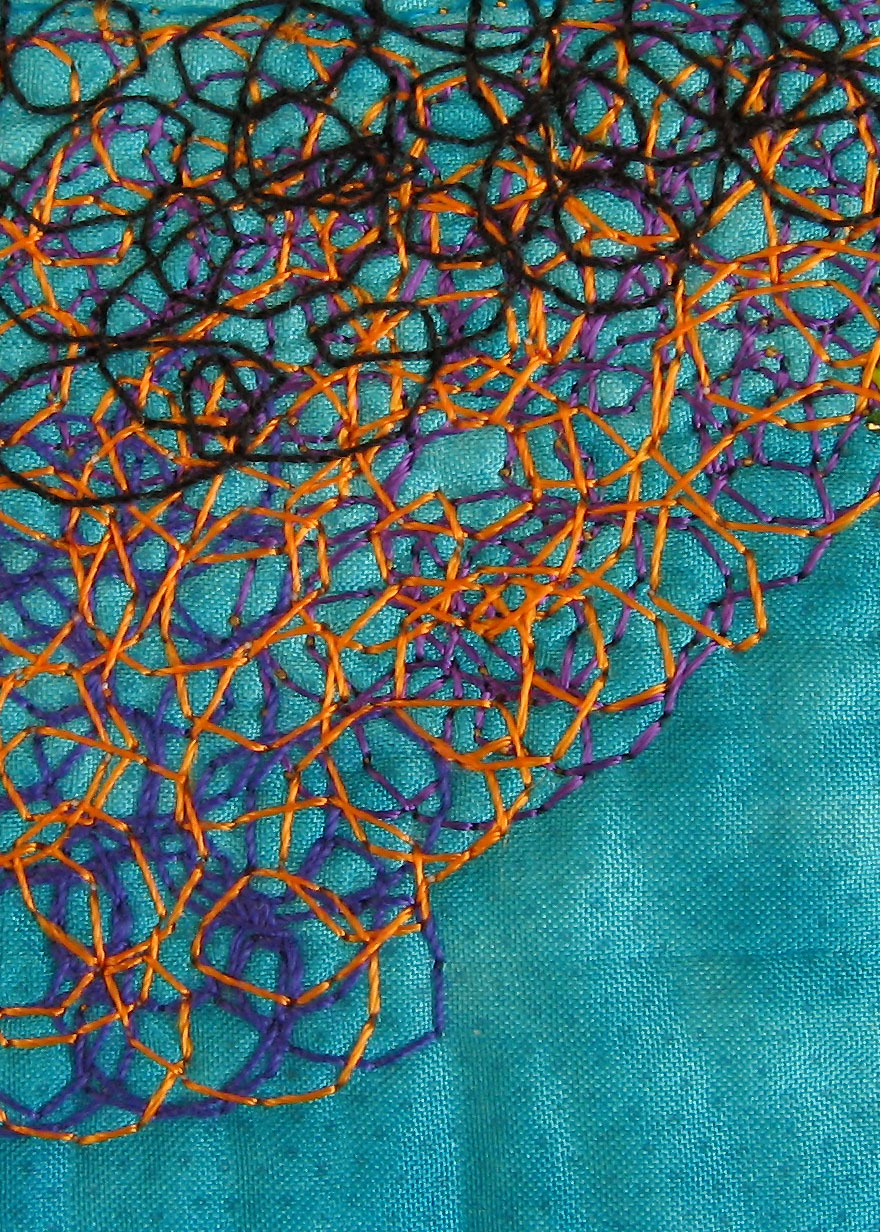
The exercise begins with layered opaque and sheer fabrics to establish a
basis for developing the design, perhaps a rhythm or a sense of movement or
flow. There can be up to half a dozen layers. Some are whole, some may be
"cut and spread" to form the channels which create the flow and reveal layer/s
beneath. The top layer is always whole, as this keeps the cut edges beneath it
from fraying. It can also give a unifying colour cast to the whole - rather like
unifying a selection of patchwork fabrics by over-dyeing them all with one tint or
colour.
The next stage, after all layers are carefully pinned together, is to stitch all
layers together on the established design lines and to develop and reinforce the
rhythm created in Stage 1by further stitching and cutting back My advice is always
to apply the KISS principle at this stage (Keep It Simple, Sweetheart). If the design
becomes too complex too early, then design options for further development have
been closed off, rather than being left open. Remember: you are reinforcing what
is already there, not adding entirely new elements.
The next stage is to select, place and bond on the focal motifs. All further
developments are intended to draw the eye to them. The main motifs - the primary
motifs - may require the support of secondary ones, as in Canberra, where there is
only one primary motif - the Matisse-type shape. It therefore requires the support
of the three secondary ones, the green circles. On these, smaller orange shapes are
placed so as to "point" towards the "Matisse"shape In Toronto, there are three
primary motifs, again Matisse-type shapes. In Phillip Island, the whole flowers are the
primary motifs, the half-flowers the secondary ones.
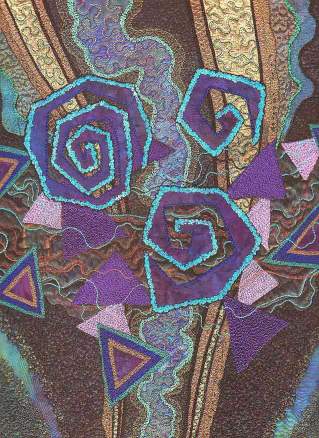
Hobart and Wellington both use spirals, which are supported by triangles
beneath and around them, on the line of the horizontal counter-flow established
in the first stage. However, they have been arranged differently. If you click to
enlarge these images, you will see that the treatment of the motifs differs in
each. Only some of the triangles in both have been given identical treatment, by
stitching close straight lines to bring them to the top of the work.
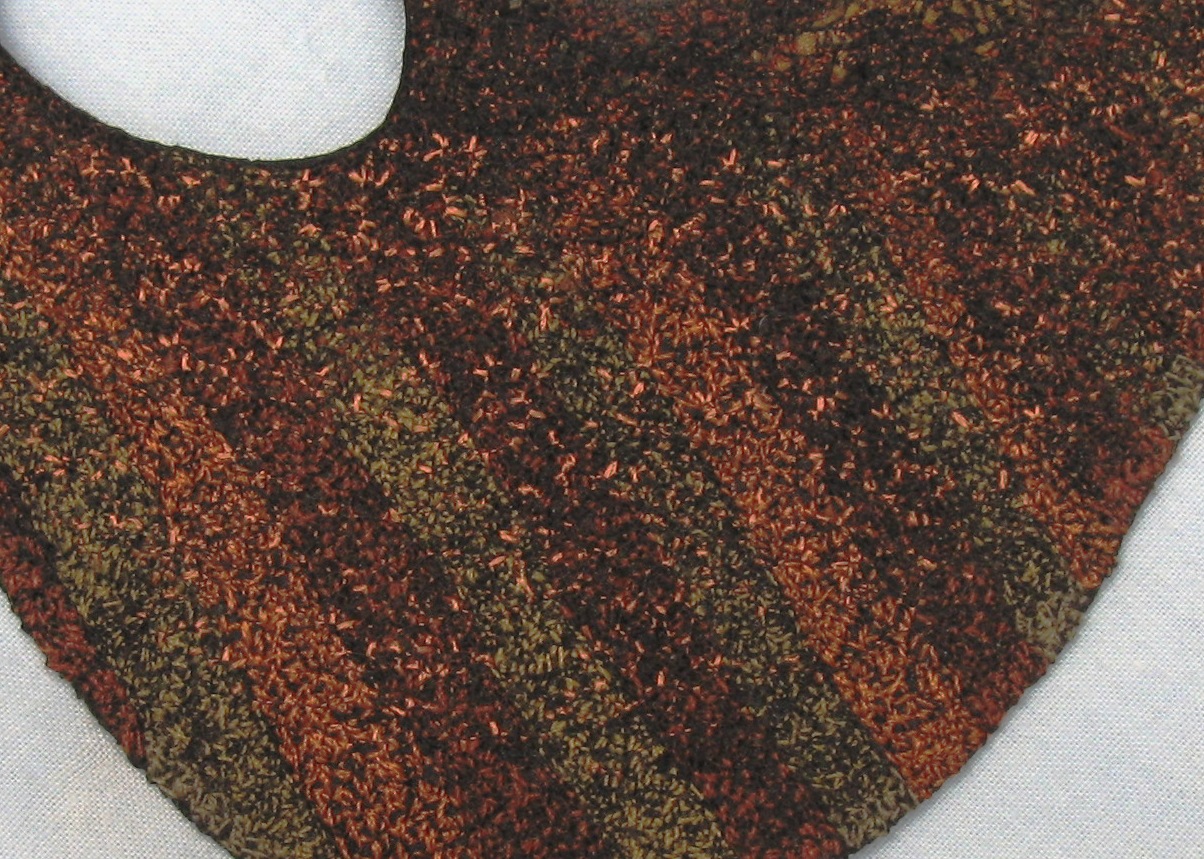
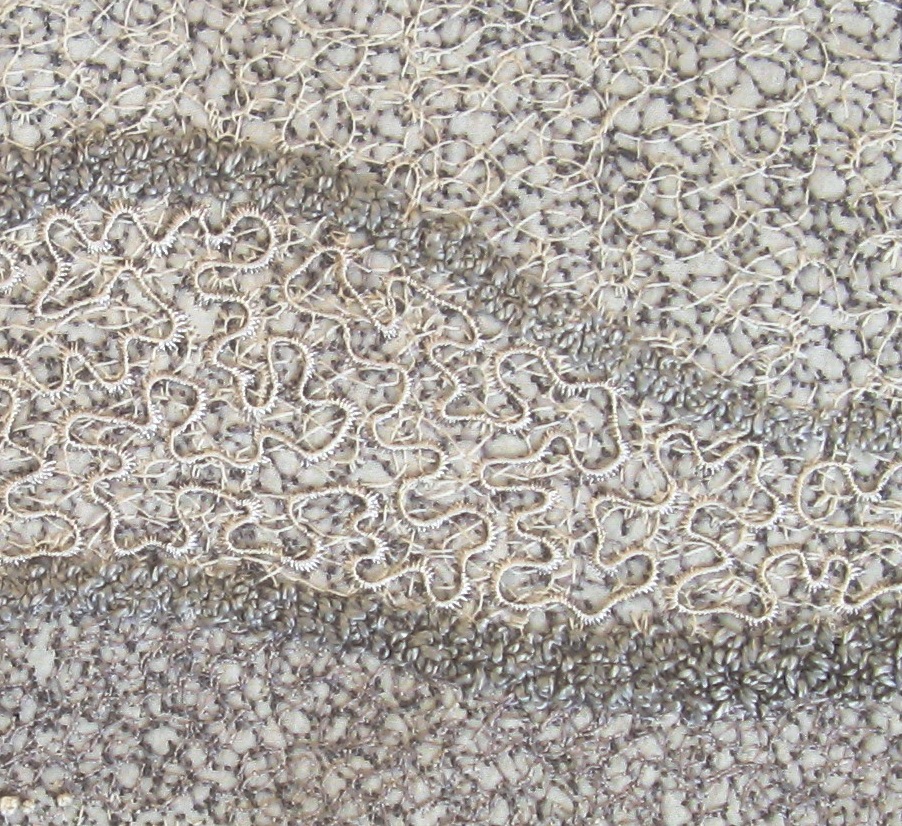
The approach to Winnipeg is altogether different and more organic. The
original rectangle has been broken down at the edges. These are all finished with
off-the-edge stitching, usually in the colour/colours of the embroidery. The
emphasis is on the more "organic" look. This is sympathetic to the organic character
of the shapes. Areas are progressively embroidered and padded, and the extra
piece with the vertical shapes (at the bottom) is placed behind for contrast.
The last stage in all pieces is to enrich the embroidery over the whole, the aim
being to direct the viewer's eye to the focal area or to follow the flow. If desired,
the piece can then be mounted. My preference is for an embroidered fabric mount
which in part extends the design on to it.
While Canberra and Wellington do not have mounts, I have extended Toronto
and Hobart with one, taking a similar approach, extending design lines and
motifs outside the original boundaries. These have been finished off so as to lift the
piece forward visually from the mount.
Toronto features a few design lines or channels extended onto the mount,
but with a change of colour and treatment. The same kind of Matisse-type motifs
appear in the mount, but only parts are visible, as if they are emerging from
under the inner, bound, border.
In Hobart, the horizontal counter-rhythm (established in the first stage) has
been extended onto the mount with the same thread ends and triangles of silk
laid under the top sheer layer. They are then brought visually to the top with
stitching. With Winnipeg, for a further contrast, the whole piece is mounted on a
formal black rectangle on which the main (roughly horizontal) lines in the piece
have been extended in black onto the mount. The heavy-thread border in
space-dyed silk yarn links the mount to the piece - but the organic shapes at the
bottom refuse to be confined and extend beyond the rectangle.
In all of these pieces, the lowest layer of fabric (over the Pellon and the
stabiliser) is lamé. Though I have exposed narrow channels of it in Toronto and
Hobart, I usually prefer to leave it covered by at least one layer of sheer in
order to tame it both visually and technically. Naked lamé can be too dominant.
Though I have exposed larger areas in Canberra, I have tried to subdue the
sheen with FME.
Return to Machine Embroidery
or go to Faces
or go to Fabric Collage
or go to Bark, Lichen and Fungi